Estimated reading time: 1 min
Here we will teach you how to create a new registration on Microsoft Azure which is the Microsoft cloud.
- How to create new application
- Where to find the application id
- How to create a secret id
- The permissions API
1- How to create new application 2- Where to find the application id Copy Link
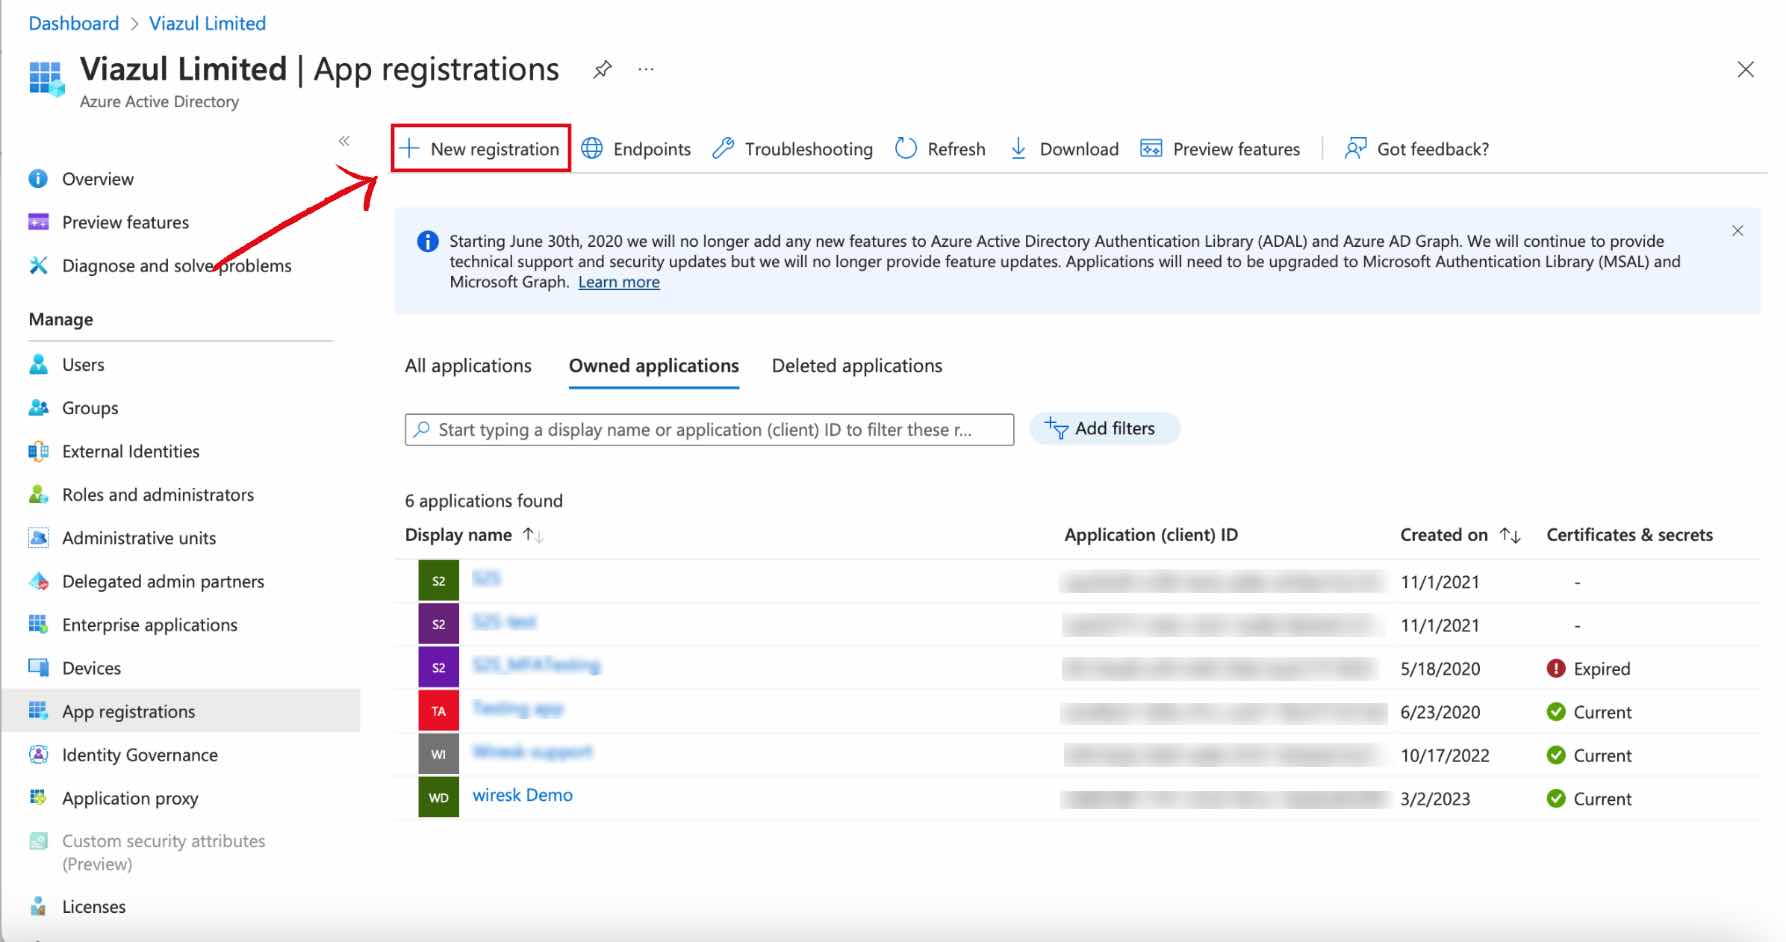
To create a new application, click on “new registration”.
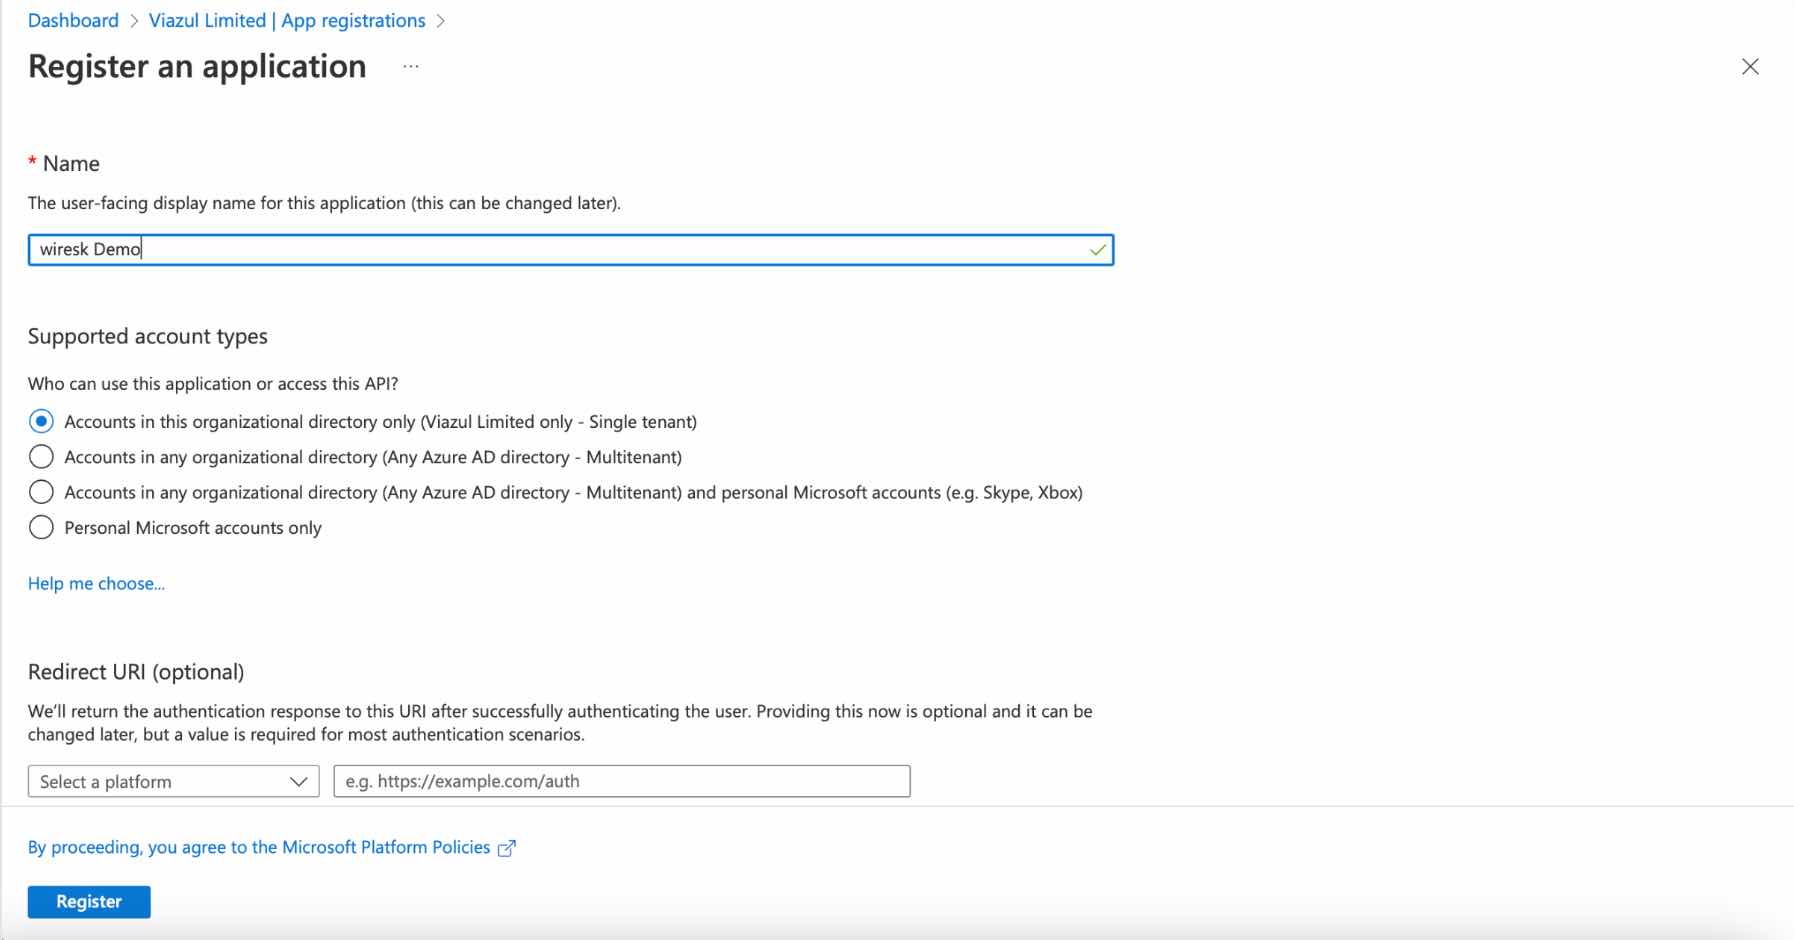
Then, enter the name of this new application, choose your tenant system and ” register “.
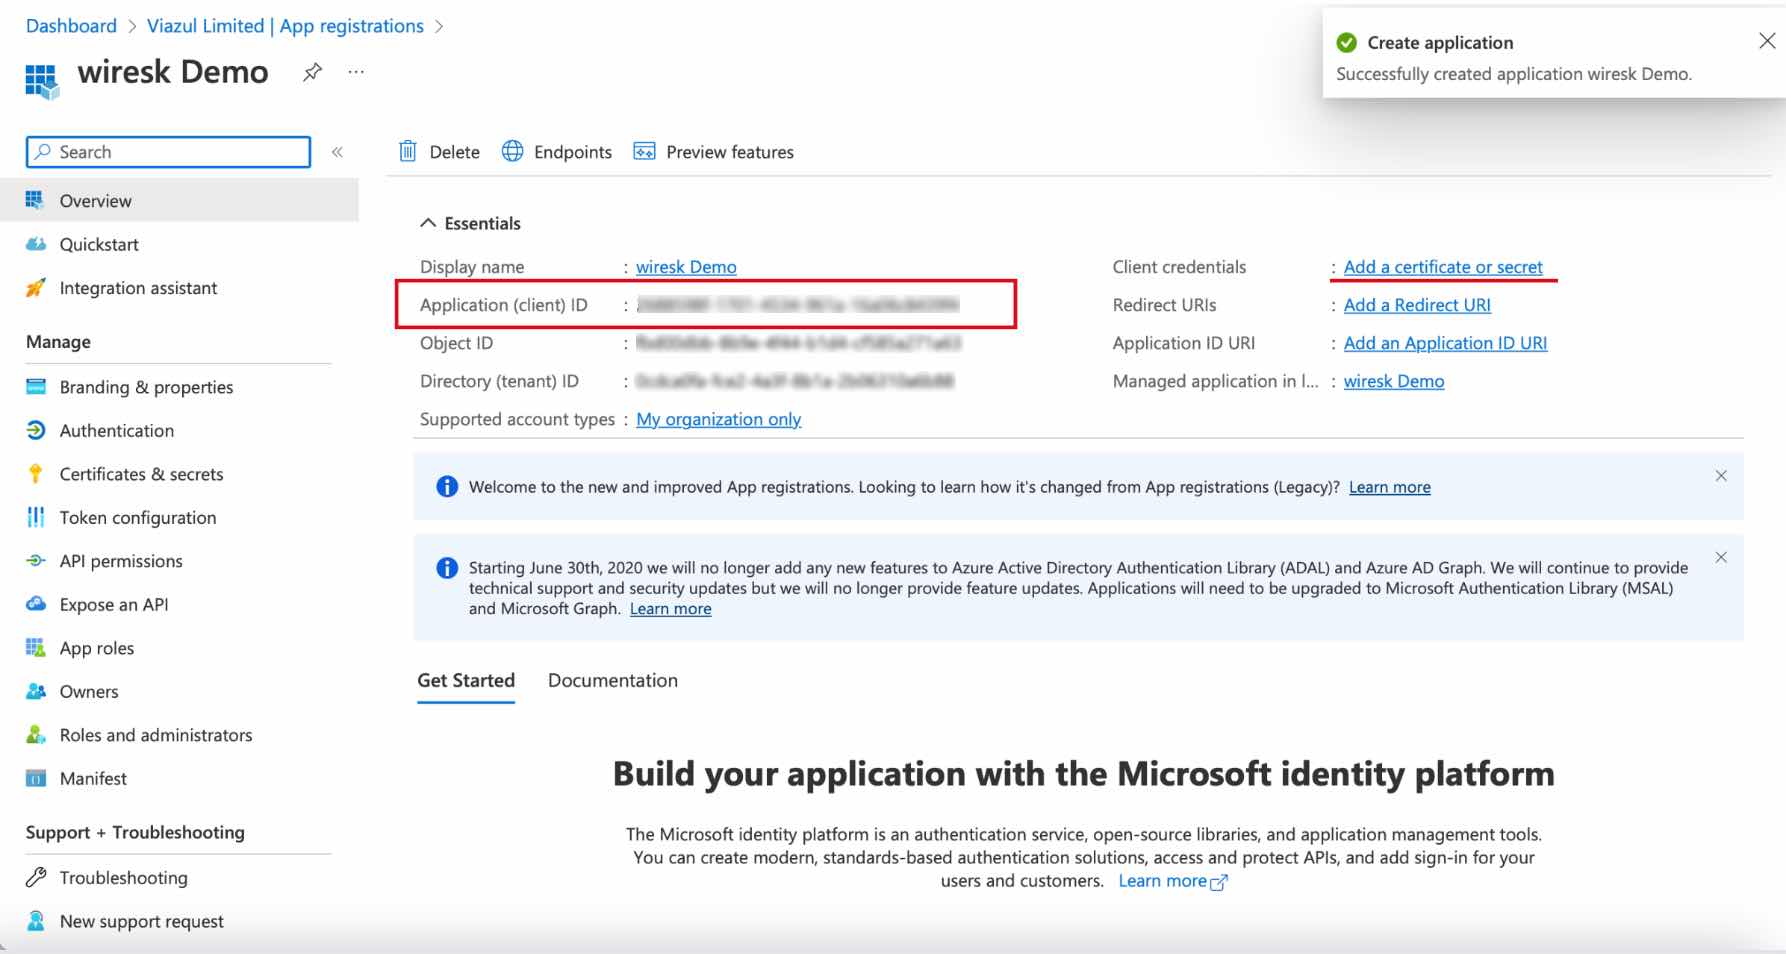
You have just created your application.
You can see your application id which can be asked to make a connection on Wiresk.
3- How to create a secret id Copy Link
Click on “Add a certificate or secret
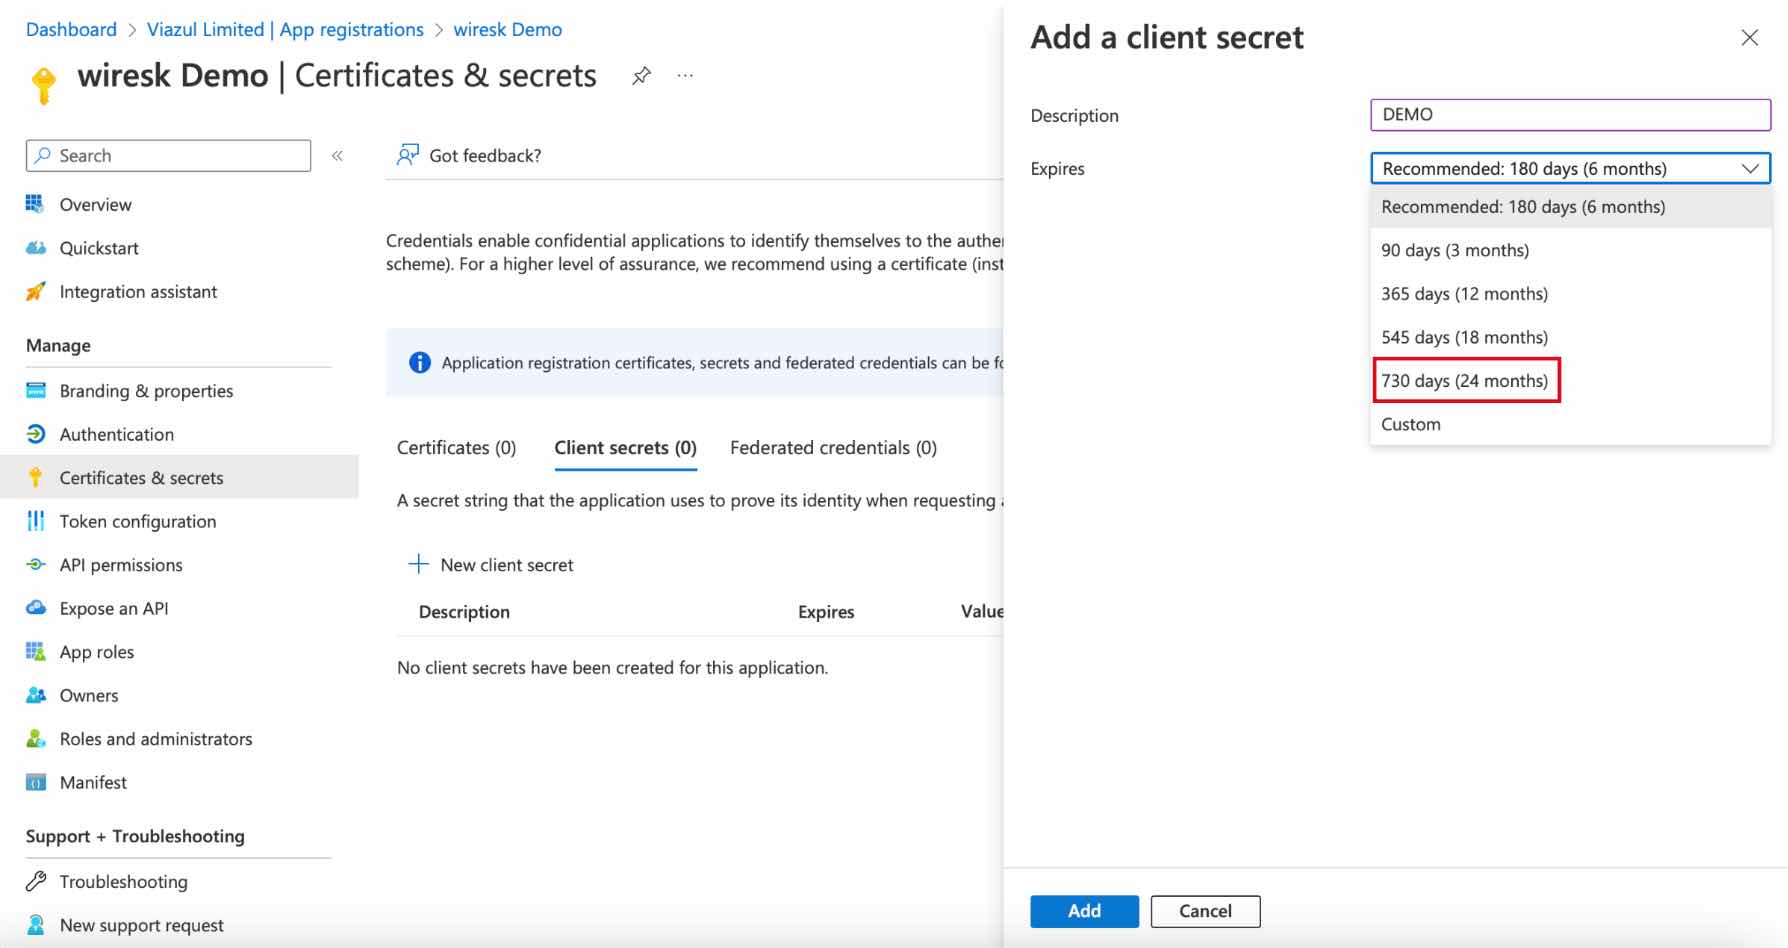
Then, ” New client secret “, a new page will appear. Enter the description of your secret and its expiration date.
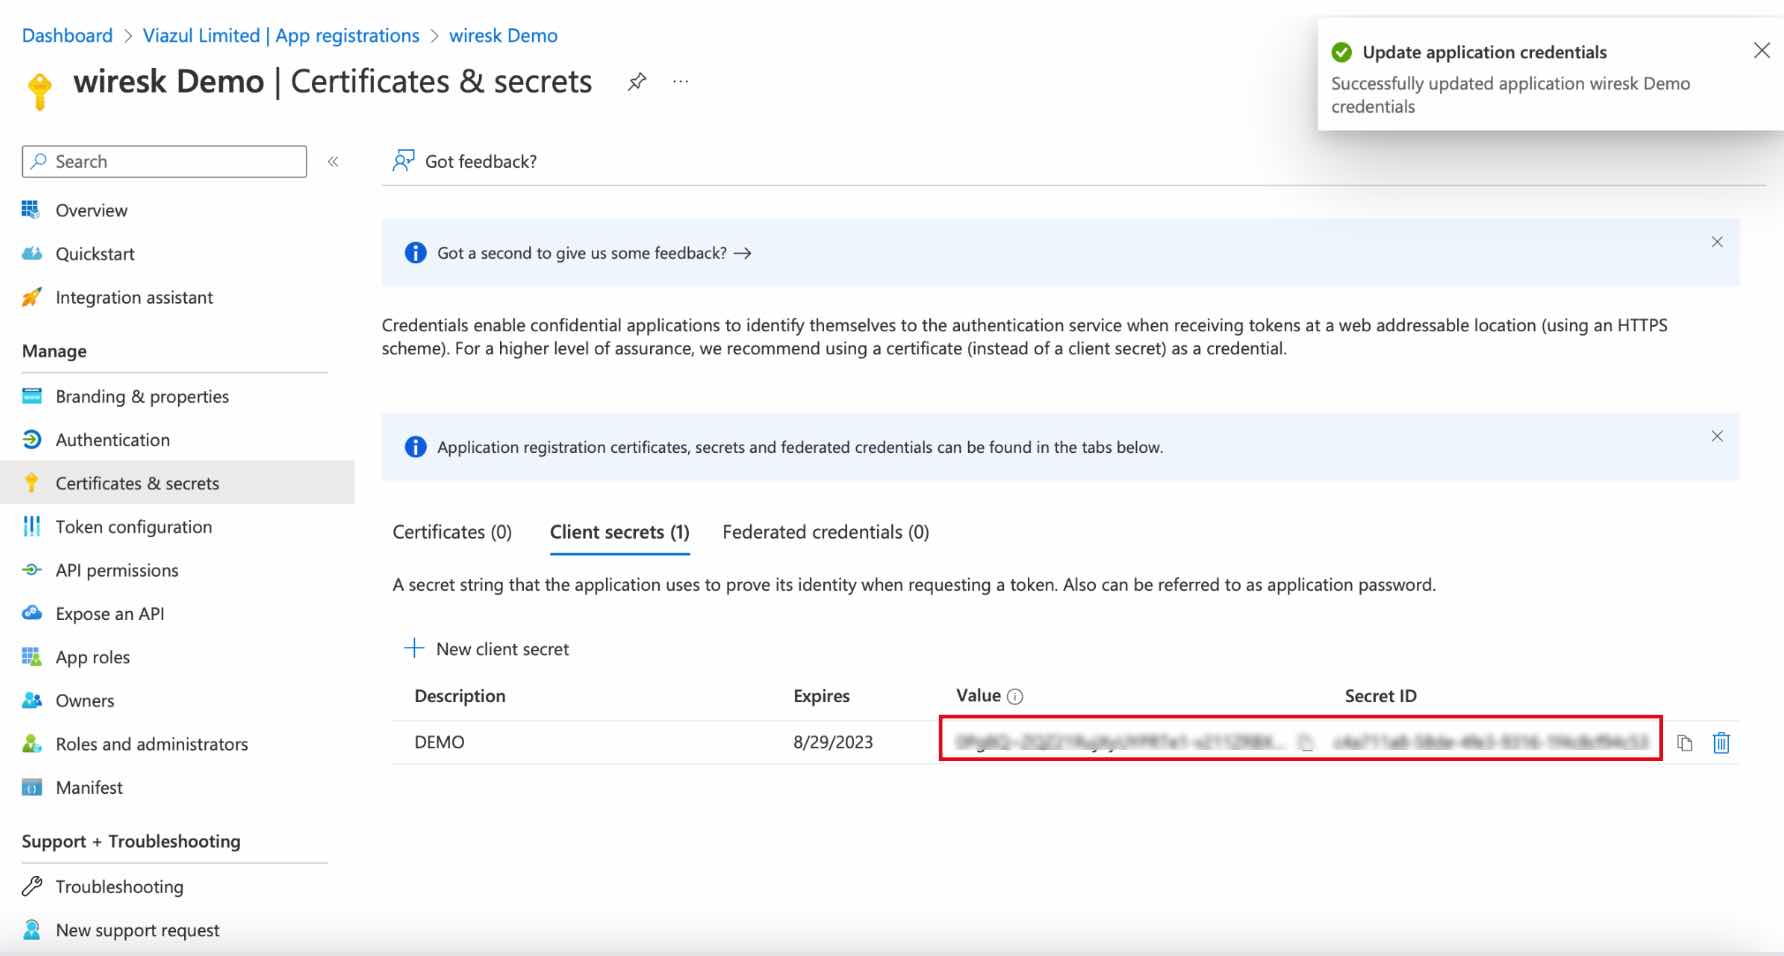
It is strongly advised to set the maximum period which is 2 years. This will prevent you from having to renew it too quickly. After that, ” Add “.
And here you can see the secret you have just created. Be careful, the “value” is only visible once, write it down or save it in a secure place.
4- API Permissions Copy Link
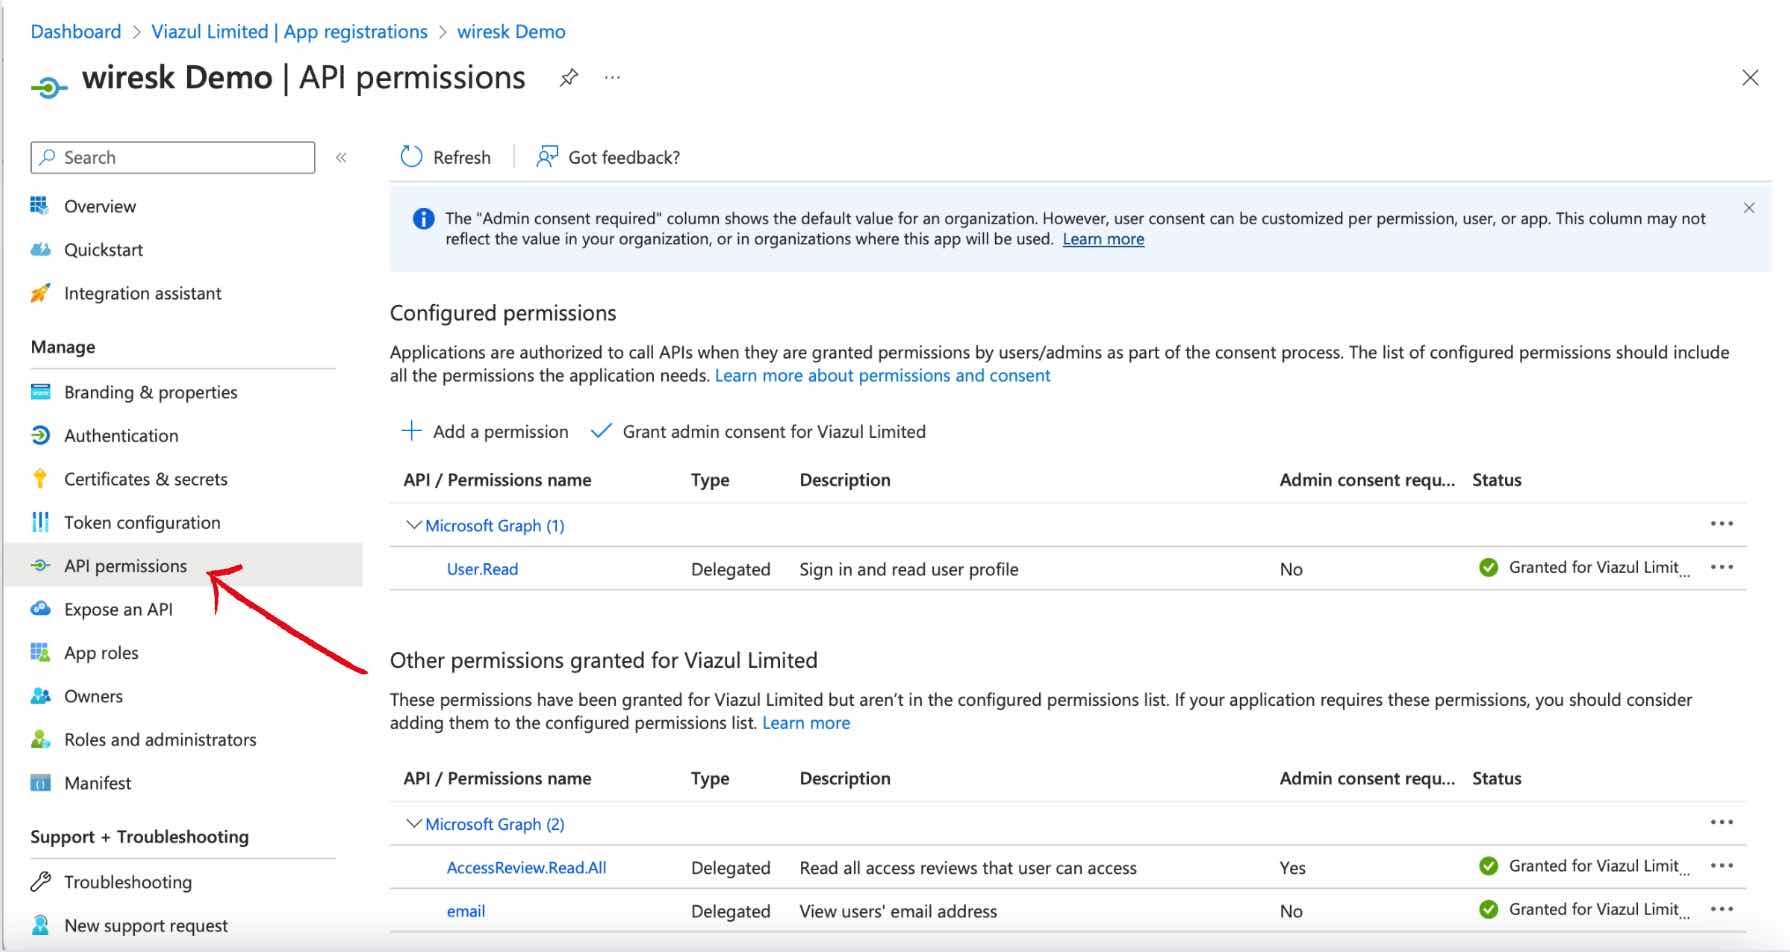
You now need to assign permissions to your API, some are already set by default. However, you will need to add new permissions in order to be able to access your API as you wish.
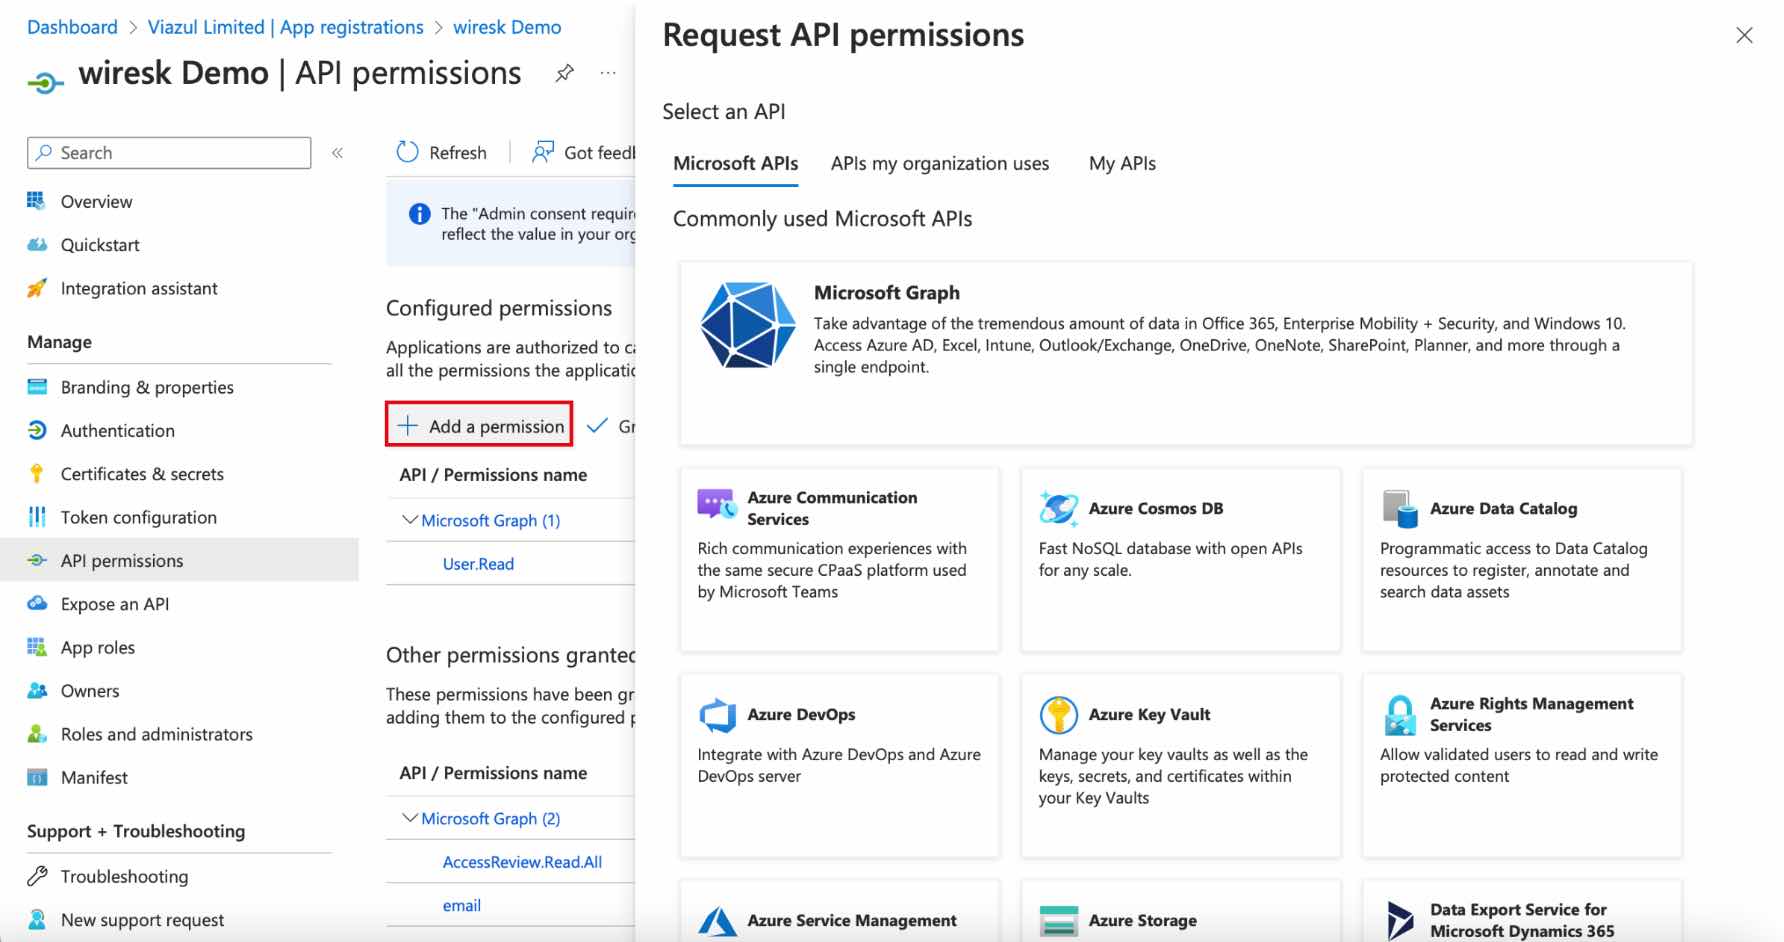
Click on “Add a permission”, a new page will open with the different possible permissions class by genre.
Go to the type of permission you want.
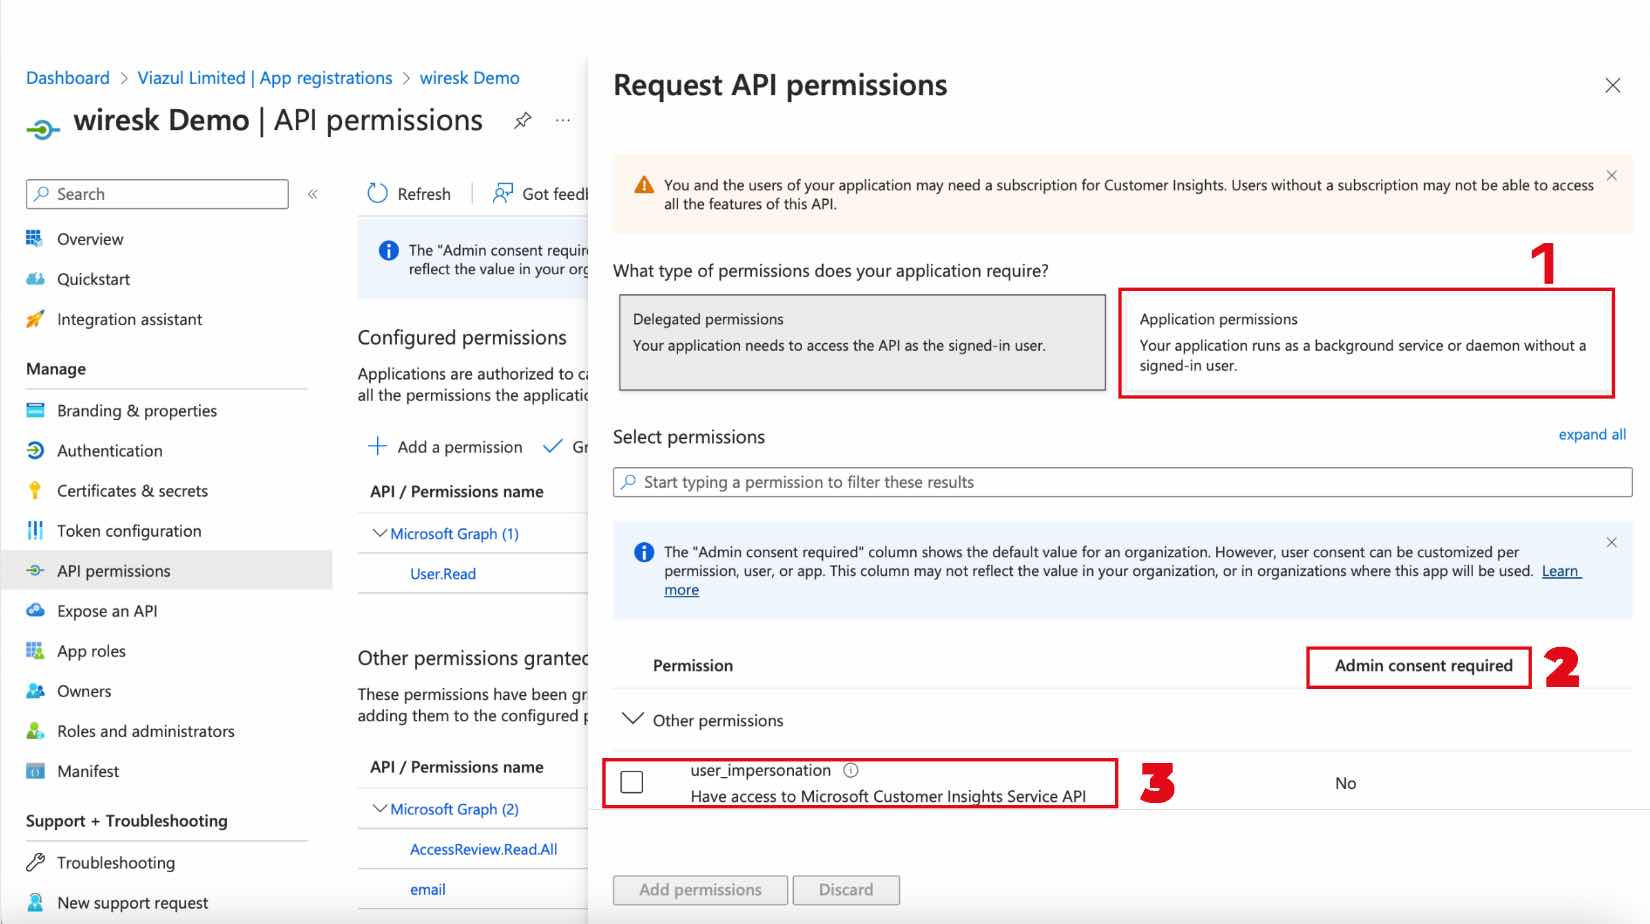
- You can see these two elements on some type of permission. On the left you are using a user account, which corresponds to the popup you have when you connect to your office. On the right is for the application. You must choose the right one.
- Some permission requires the approval of an admin. It is indicated to the right of each permission if it needs admin approval with a “yes” or “no”.
- This is one of the possible permissions. To activate it you need to check the box on the left of the text, then click on “add permission”.
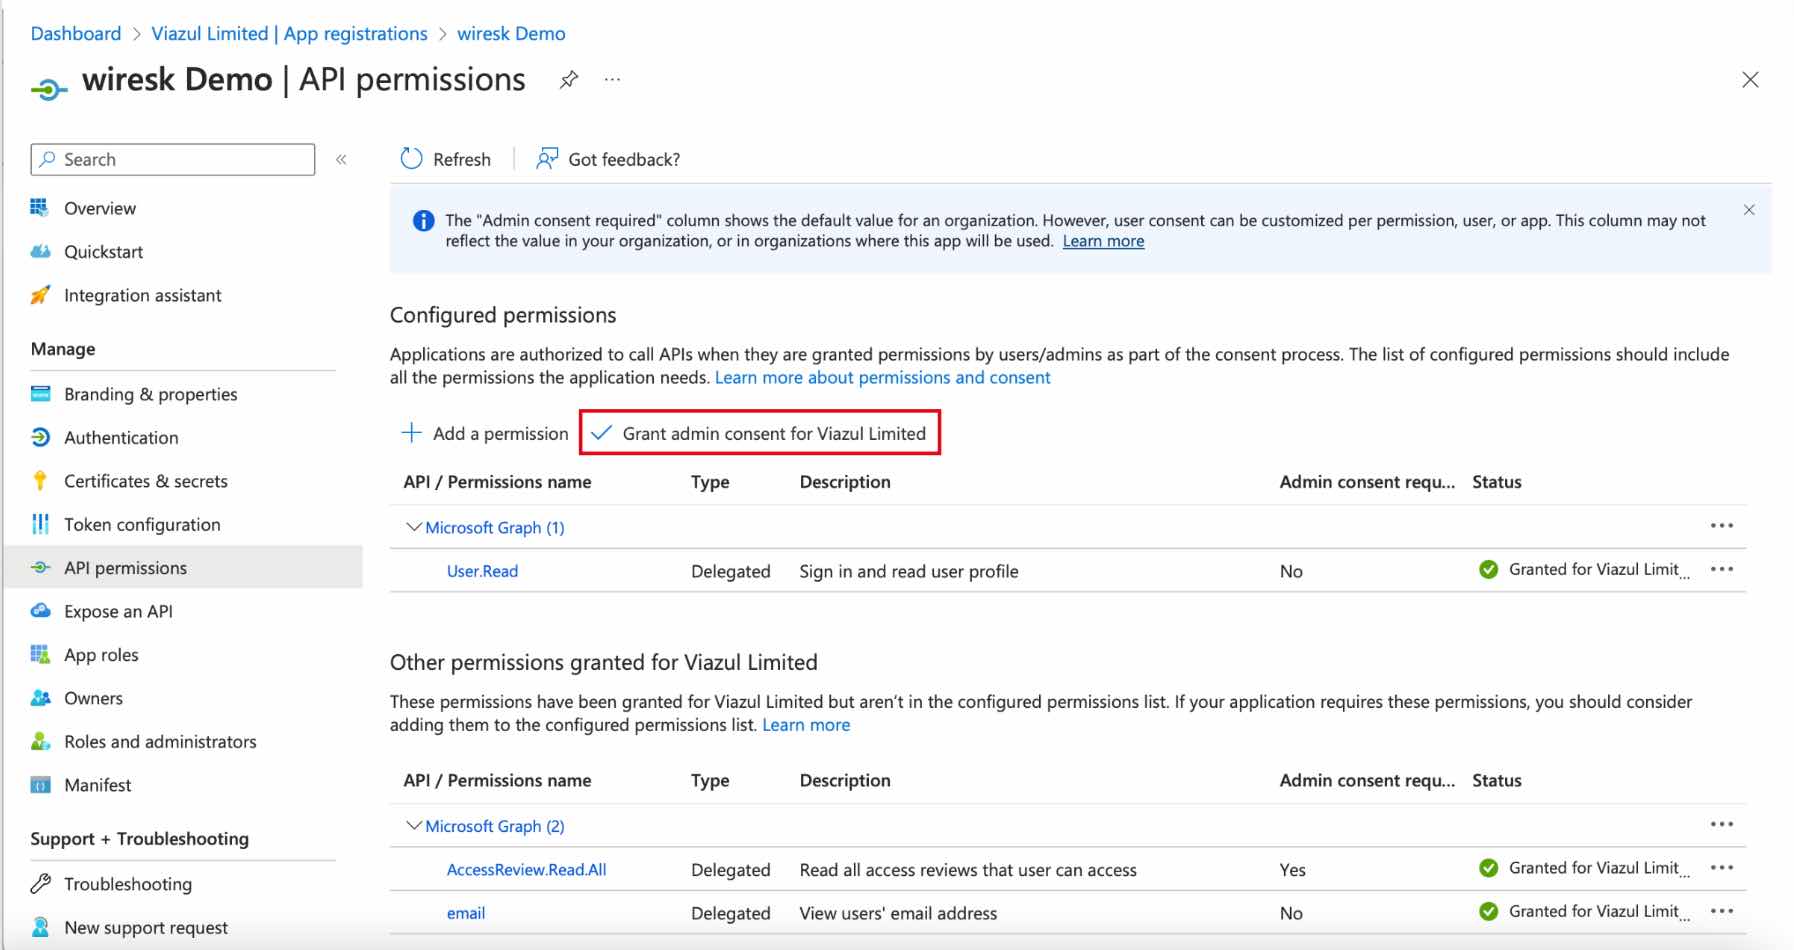
To grant permission as an admin, click on “Grant admin consent for Viazul Limited”.