Prerequisites:
- A valid connection to an app
- An entity selected
Steps:
- Open the Query Builder.
- Select the entity that you want to query.
- Select the columns that you want to display in the results.
- Add any rules or filters that you want to apply.
- Click on the Preview button to refresh the results.
Detailed steps:
- Open the Query Builder.
The Query Builder is a graphical user interface for creating SQL queries. It is usually located in the Reports or Data section of your system.
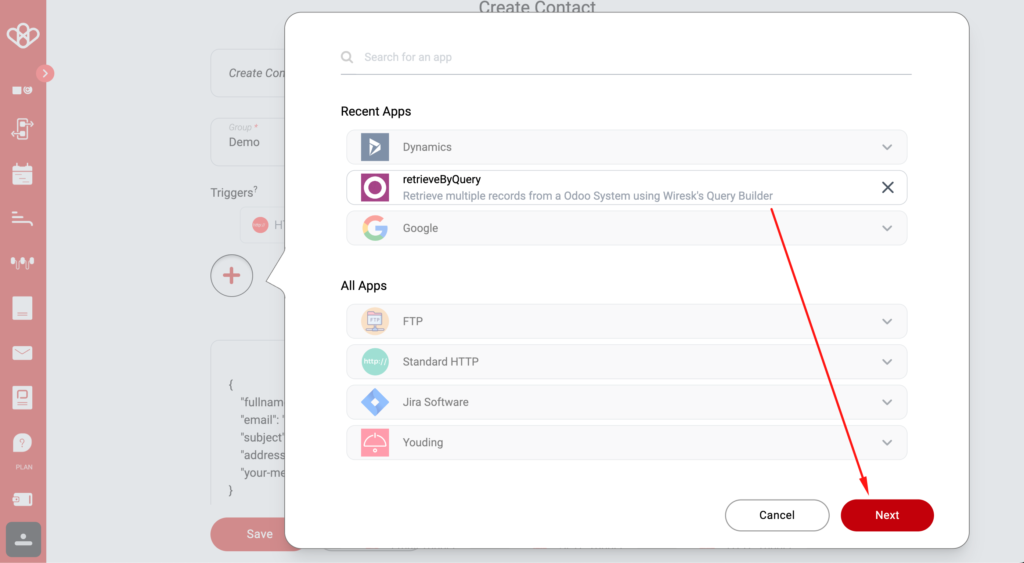
- Select the entity that you want to query.
An entity is a type of data that is stored in your system. For example, you might have entities for customers, orders, or products.
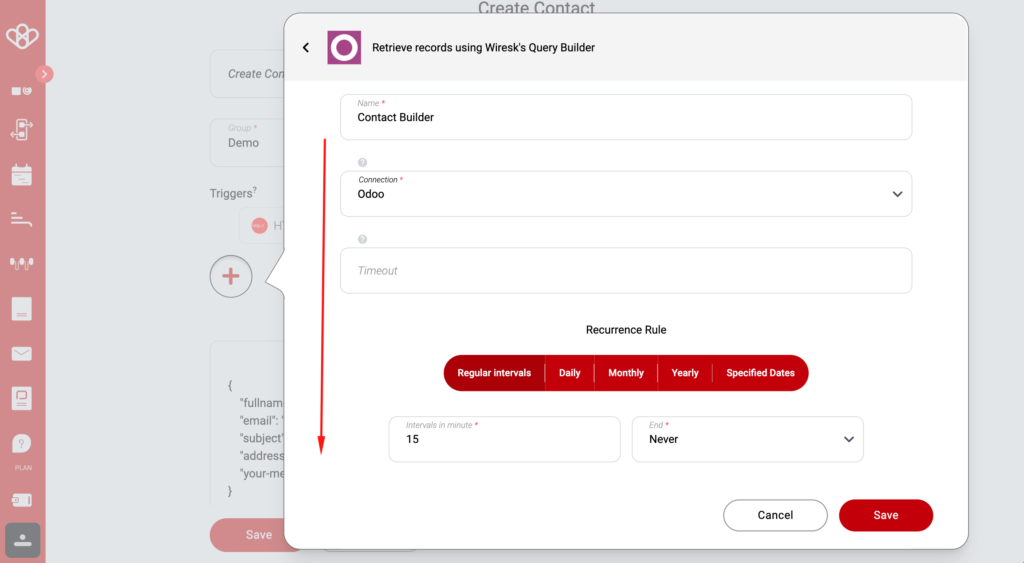
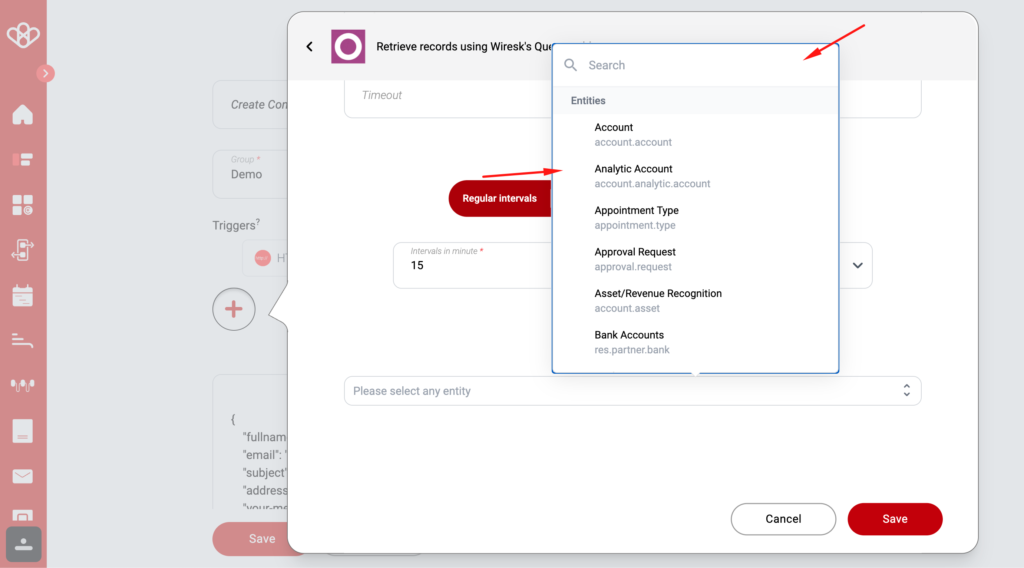
- Select the columns that you want to display in the results.
Once you have selected an entity, you can select the columns that you want to display in the results. The columns that are available will vary depending on the entity that you selected.
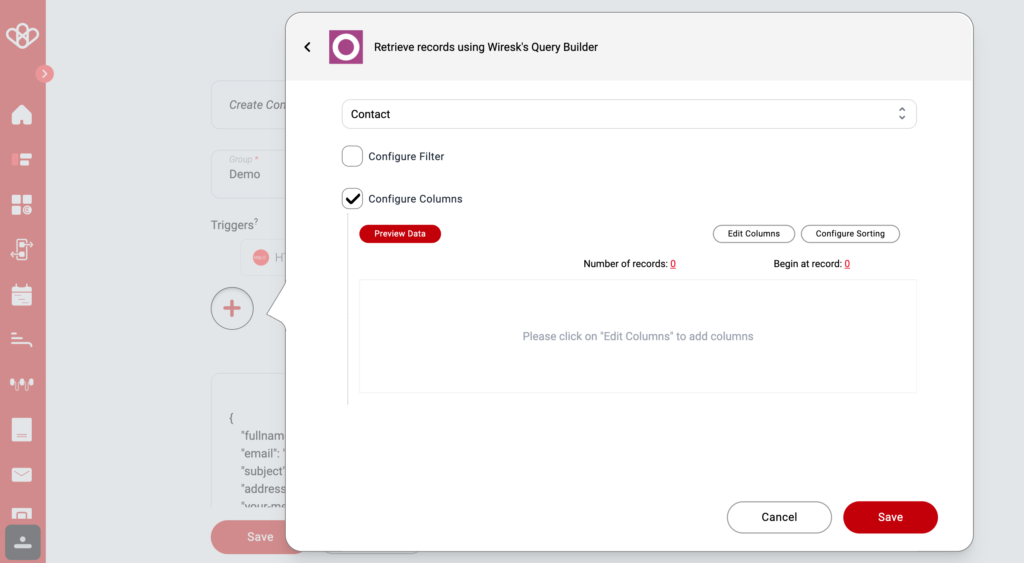
Click on Edit Columns
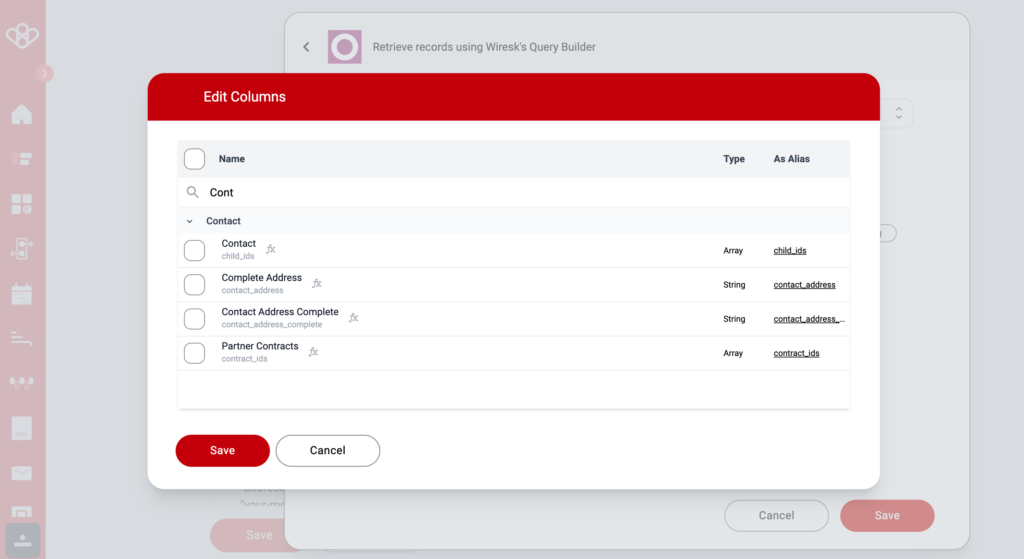
Example: Select Contacts, Phone, Email, Adress
Then Save
Click on Preview Data
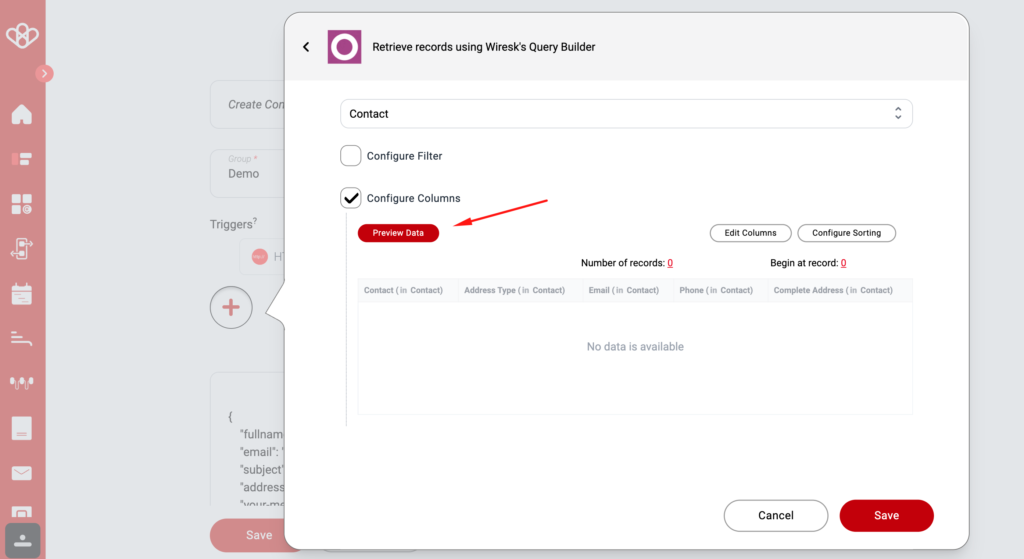
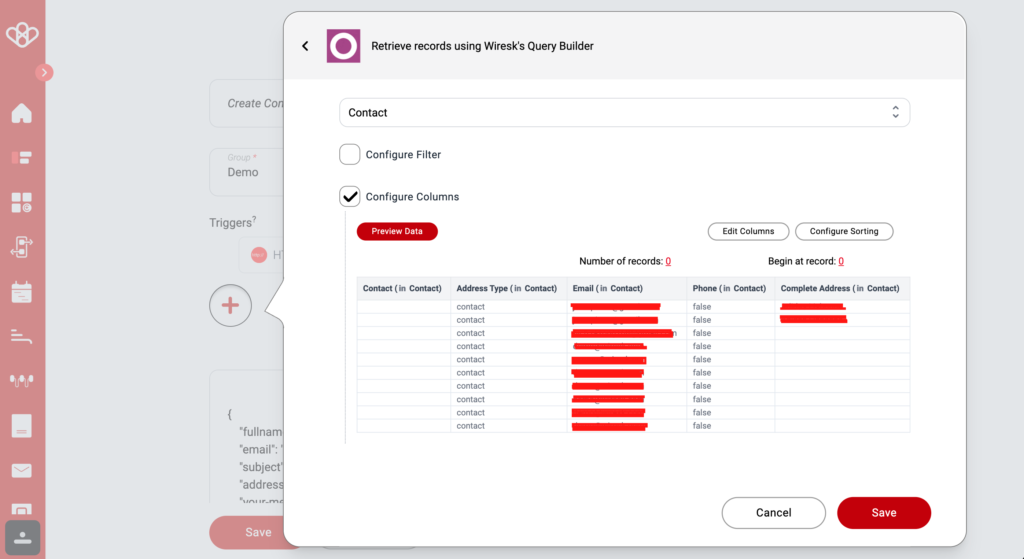
The Query will display your selected data
- Add any rules or filters that you want to apply.
Rules and filters allow you to narrow down the results of your query. For example, you might want to only include results where the customer name contains the word “John”. Click on Configure Sorting.
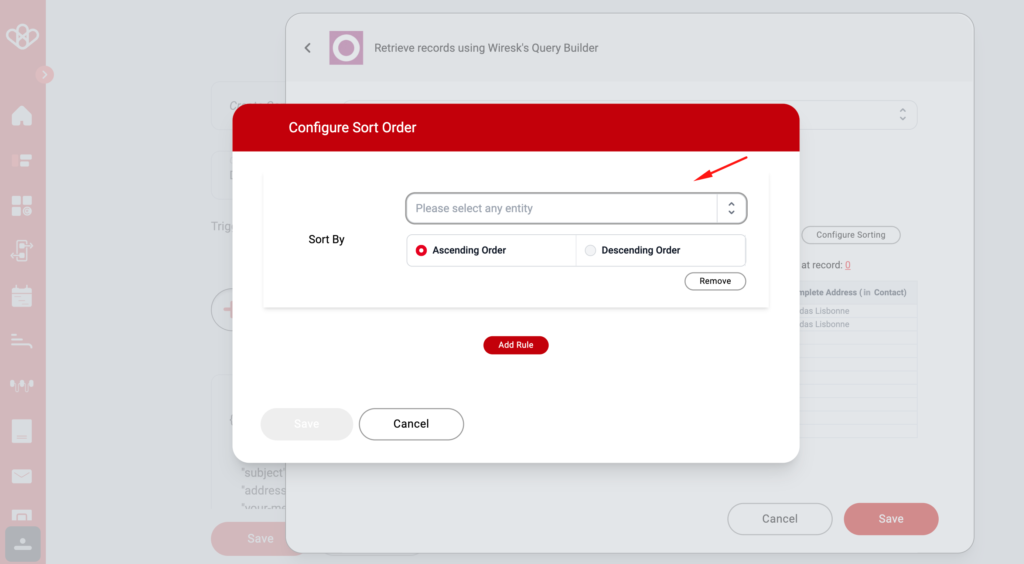
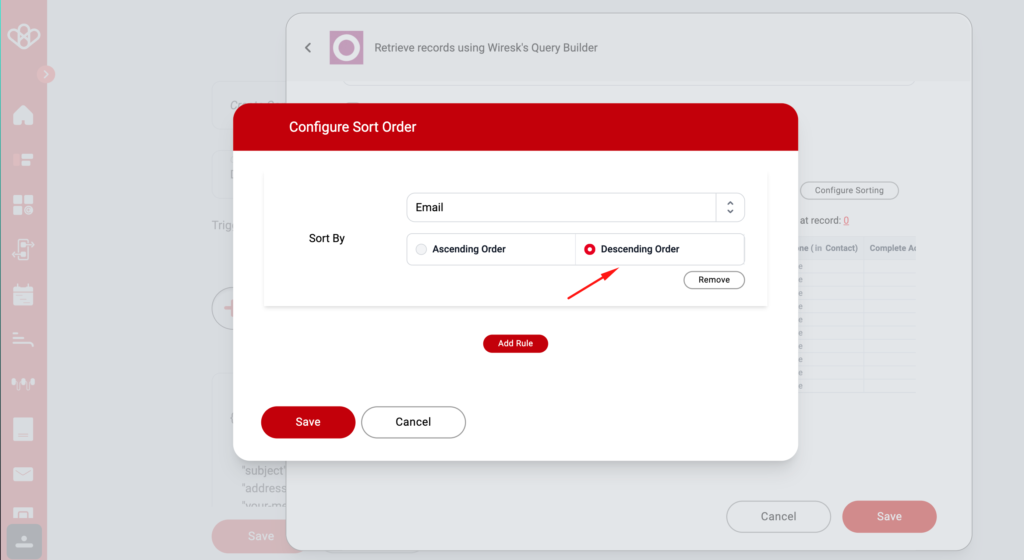
Then save (the rule will be applied) or Add a Rule to add a specific rule
- Click on the Preview button to refresh the results.
The Preview button will generate a SQL query based on your selections and display the results. You can use the Preview button to test your query before running it.
Example:
Let’s say that you want to query your system for all contacts who have been registered in the past month. You would follow these steps:
- Open the Query Builder and select ODOO.
- Select the Contact entity.
- Select the following columns:
- Contact -> Name
- Register -> Date
- Add the following rule:
- Order Date >= 2023-08-18 AND Order Date <= 2023-09-18
- Click on the Preview button to refresh the results.
